Sunday, December 19, 2010

Savory: Lamb With Artichoke Hearts


Lamb. My great marital culinary divide.

My husband, half Irish and half Lebanese, grew up eating it several times a week. While wearing wool sweaters.

My mother, who grew up in a kosher home, would sooner prepare pork. She has terrible associations with lamb, including an unfortunate incident when it was ground up for hamburgers. It never graced our table, and subsequently it never occurred to me to add it to my cooking repertoire. That is until I met my husband.

Anxious to please/show off, I purchased a Lebanese cookbook and got to work. Spinach pies, hummus, and kibbe soon appeared, all to grateful ooh's and ah's. We moved in together shortly thereafter. I was sure it was the food.

But I stumbled on the lamb, and resisted it for some time. It was as foreign to me as it was familiar to him. One day, my then boyfriend now husband was reminiscing about his childhood, and he kept talking about a stew his grand-mother used to make, Fasulia. It has green beans, and cinnamon, and...lamb. Stew meat. As in should be easy to work with stew meat. I immediately went to work and found a simple recipe. It was a hit with my husband, although I mostly ate the vegetables, being a little shy. My efforts were rewarded and shortly thereafter we were engaged.

Feeling more confident, I decided to move on to more sophisticated parts. Which tend to be costly, and therefore helpfully eliminated my choices to the more economical. I decided to try lamb shoulder chops. They are priced right, cook individually, and are available on the bone. I went searching for a recipe and found one with all my favorite things including artichoke hearts, cherry tomatoes, lemon, and olives. Bonus: It comes from Martha Stewart, a woman whose recipes have consistently been fool proof. I doubt I would ever have her over for dinner, but am a more confident host when I have cooked from her experience.

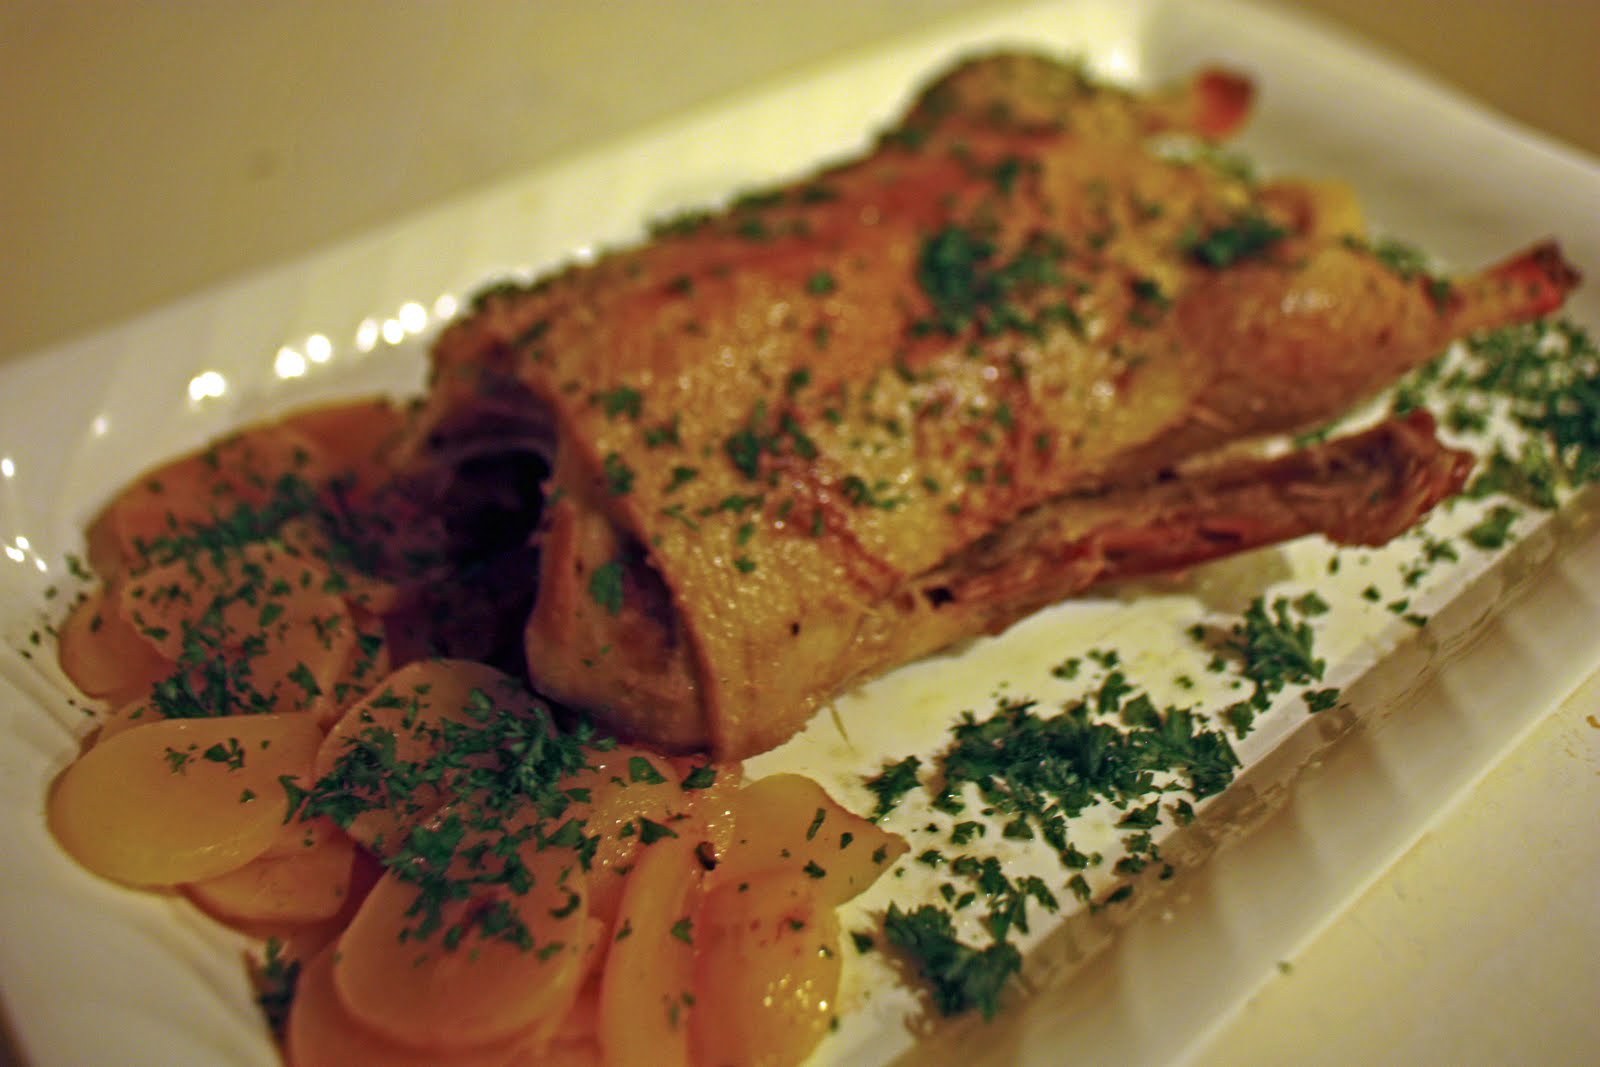
This recipe comes together quickly, simply, and beautifully. It is a one dish meal, preferably accomplished with a large, heavy skillet. I often break out my electric skillet for this, as it is large enough to hold the ingredients perfectly. The lamb is sauteed, and perfumes the entire kitchen with a wonderful rich aroma. Then toss in the vegetables, later the wine, and finish with the lemon zest and olives. I like to serve it with a lemon rice.

I made this dish for my husband one evening and to my surprise, we both relished it. The lamb cooked on the bone makes this meat particularly succulent and delicious. It also cuts into small pieces, making a strongly flavored meat more manageable with each bite. Sweet wine offsets the gaminess. The vegetables perfectly compliment the lamb, elevating it into some sort of Mediterranean celebration.

Two weeks later we were married. I am not sure if my cooking ultimately shepherded my marriage, but am positive that it brought us closer together.

Enjoy every bite.

Lamb With Artichokes

Original recipe:
http://www.marthastewart.com/recipe/lamb-chops-with-artichoke-hearts

Ingredients
  • 4 shoulder lamb chops (1/2 inch thick each)
  • Coarse salt and freshly ground pepper
  • 1 or 2 tablespoons extra-virgin olive oil
  • 1 medium onion, halved crosswise and cut into 1/4-inch-thick slices
  • 4 artichoke hearts (water-packed, from one 14-ounce can), rinsed, drained, and each cut into six wedges (Sometimes I use artichoke bottoms, which are a little easier to work with)
  • 1/4 cup fruity white wine, such as a New Zealand Marlborough Valley Sauvignon Blanc (this recipe also works well with a nice vermouth)
  • 1 cup homemade or low-sodium store-bought chicken stock
  • 1/2 cup cherry tomatoes, halved
  • 1/2 cup pitted Kalamata olives, halved
  • 1 tablespoon lemon-zest strips

Method
  1. Rinse chops; pat dry. Season with salt and pepper. Heat 1 tablespoon oil in a large skillet over medium-high heat until hot but not smoking. Cook lamb in two batches, turning once, 4 to 5 minutes per side for medium-rare. Transfer to a platter; loosely cover with foil.
  2. Add onion and artichoke hearts to same skillet (add 1 tablespoon oil if skillet is dry). Cook over medium heat until softened and golden (do not brown), 3 to 5 minutes. Add wine; cook until almost all liquid is evaporated, about 3 minutes. Add stock and tomatoes; cover, and cook 3 minutes. Uncover; cook until sauce is reduced by half, 3 to 5 minutes. Stir in olives and zest. Season with salt and pepper.
  3. Spoon vegetables and sauce over lamb, and serve.

Thursday, November 25, 2010

Overlooked: Cranberry Tart


Cranberries are overlooked. Don't get me wrong, we use them all right. Cranberry juice is always a hit. Craisins reinvented dried fruit. And cranberry sauce is a staple at many Thanksgiving tables. No the cranberry dilemma is not for lack of products or volume. It is for lack of inclusion.

You see, fresh cranberries rarely make it to the dessert table. Apple crisps, blueberry crumbles, pumpkin pies all reign over the holiday, but cranberries are suspiciously missing in action. I think people are turned off by their tartness, and assume there is not much to be done with them. But I say if you can turn rhubarb into something special, cranberries pose no great challenge.

Here is a terrific, simple recipe that is sure to please. The sweet and sour of the cranberries and orange are complemented by a splash of Cointreau and lots of rich wonderful cream. The tart is deconstructed, which makes preparation easy and the overall effect visually stunning. The result is a fun, elegant dessert that provides a wonderful stage for the mighty cranberry.

Happy Thanksgiving and enjoy every bite.

Cranberry Tart

Ingredients
  • 1 large orange, zested and juiced
  • 12 - 16 oz cranberries
  • 1 stick unsalted butter
  • 1 3/4 + 3 tbsp flour
  • 2 tbsp + 1/4 cup + 2/3 cup sugar
  • 1 3/4 cups flour
  • pinch of salt
  • 3/4 cup heavy cream
  • 2 eggs
  • 1 tbsp Cointreau

Method
  1. Preheat the oven to 350 degrees
  2. Combine the cranberries, orange juice, and 2 tbsp sugar in a large bowl. Set aside.
  3. Melt butter on low heat. Add orange zest (approx. 1 tbsp). Let sit for 5 minutes.
  4. Combine 1 3/4 cup flour, 1/4 cup sugar, and salt. Slowly pour the butter into the mixture; stir with a fork until blended.
  5. Press the dough into the tart pan. Place in oven and bake for 20 minutes. Remove from oven and allow to cool.
  6. Heat the oven to 400 degrees.
  7. Combine the remaining sugar, flour, eggs, Cointreau, and cream.
  8. Drain the cranberries and place in the tart pan. Pour the cream mixture over the top. Sprinkle with sugar.
  9. Bake for 35 minutes and then cool on a wire rack.

Saturday, November 20, 2010

Sweet: Cranberry Almond Bark


The Thanksgiving guest is always searching for the perfect gift. What if someone else (and they will) brings flowers and wine? How many sides and dessert are enough?

Here's a simple little hostess gift that takes less than 10 minutes to make and is sure to please. This recipe is a great choice because everyone has different preferences, there is always one person with some weird allergy to regular chocolate and can't partake in the standard offers, and the cranberries give it a nice, Thanksgiving feel. Enjoy every bite.

Cranberry Almond Bark
adapted from Jane Sharrock's Who Wants Candy

Ingredients
  • 16 oz of white chocolate chips
  • 1/2 cup toasted almond slivers
  • 1/2 cup chopped dried cranberries

Method
  1. In a double boiler, melt the chips
  2. Add the almonds and cranberries
  3. Pour onto a lined baking sheet (parchment paper is fine). Smooth into a thin layer.
  4. Cool in the fridge for 1 hour. Break into pieces and serve.

Sunday, October 24, 2010

Sweet: Caramel Apples

I really miss the old Halloweens I had as a child, when it was a big deal to get a Hershey bar and not so out of the ordinary to get a homemade treat.

This year for Halloween we are giving out glow sticks, but the first 12 (OK 10 - my kids are going to get one each) lucky trick or treaters are going to get a delicious homemade caramel apple to boot. We live on a small, cobblestone alley where everyone knows everyone - I always say it's like living on Sesame Street. Most of the kids that will be stopping by are on a first name basis with us, and they will be with their folks who are also our friends and neighbors. They know us to be fairly respectable, and so hopefully that will mitigate any crazy daisy razor fears that have fueled the wrapped candy rage since the eighties.

I have gone through many a caramel apple recipe, unwrapped countless cellophane caramel wrappers, and made myself crazy searching for the popsicle sticks. and this is by far the best approach. The recipe itself is fairly straightforward but does have a few tricks. You can purchase the wooden sticks at any craft store. The caramel cooks nicely in a Le Creuset or other heavy pan, and you will need an instant read thermometer. I special ordered an infrared one just for giggles, and because that is MY treat for this holiday. Super cool.

Finally, there is wrapping. You can purchase a bubble apple, 12 x 12 cellophane squares, or boxes. Personally, I like the boxes and the bubbles because they are no muss no fuss, but if you are doing big quantities and have time to wrap and tie on your hands, it makes sense to buy the cellophane. All of this can be purchased online at various candy supply stores.

This year I will be managing the process with my co-hosts, SpongeBob and Super Why. Both are very excited to make and eat these apples, and especially to share them. I will take lots of pics and post shortly. Until then, happy Halloween and enjoy every bite.


Old Fashioned Caramel Apples
from Jane Sharrock's Who Wants Candy

Ingredients
12 medium apples
2 cups sugar
1 cup packed light brown sugar
2/3 cup light corn syrup
1/2 cup butter
1 cup half and half or evaporated milk
1 tsp salt
2 tsp vanilla extract
2 cups chopped nuts (I used honey roasted peanuts) - optional

Method
  1. Wash and dry apples. Remove stems. Insert wooden skewer into each, using a twist-like motion so the apple will not split.
  2. Cover a large area with wax paper (counter top will do nicely).
  3. In a large, heavy pot combine all the ingredients except the extract and nuts. Bring to a boil and cook until 246 degrees. Add vanilla.
  4. Remove from heat and cool slightly until thickened.
  5. Double dip the apples and then roll bottoms in chopped nuts. Place on wax paper. Cool until firm and serve.

Saturday, October 16, 2010

Overlooked: Duck & Turnips


Sometimes when I am cooking I like to choose the thing that is most overlooked, either in the store or the pantry. The bumpy, lumpy tomato that nobody wanted. The gamey game that seems improbable.

So it was with was duck and turnips. The latter I received as part of my weekly CSA share, and the former is a long time favorite of mine. I am not sure why duck is overlooked by my fellow cooks. It is readily available, grown wild (very difficult to domesticate duck - you can't make them sit around a confined area like you can with other poultry), affordable, and delicious. I find it is no more work than chicken, albeit more fatty, but I for me that is a bonus. I save what is rendered, which has a sweet taste and cooks beans and potatoes (and in this case, turnips) beautifully. Usually I can make fat from 1 duck last for about 3 weeks.

Turnips are a lonely root vegetable. If you can find them at the market, they tend to reside in less desirable shelf space, quietly looking out and waiting to be taken home like lost puppies. They taste like a cross between cabbage and potato, and are full of vitamins. I also like turnips because they are easy to prepare; just peel, chop, and cook.

This week I had a duck in my freezer and turnips in the pantry, and so I went recipe shopping. Julia Child always is my first resort for land of the lost items, and so it was that she had a simple, easy recipe for the 2 of them. I love her simplicity; the recipe has less then 10 ingredients and just 6 key steps to create a tasty dinner for 4. This recipe was part of the Julie/Julia project, and the post is worth a read.

The recipe is presented below for your viewing consideration. Enjoy every bite.

Caneton Poele Aux Navets
(Casserole roasted duck with turnips)


Ingredients
A 5 1/2 lb ready to cook ducking
1/2 tsp + 1 /2 tsp salt
1/8 tsp pepper
3 tbsp olive oil
4 parsley sprigs + 2 - 3 tbsp minced parsley
1/2 bay leaf
1/4 tsp thyme
2 lbs crisp white or yellow turnips

Method
  1. Preheat the oven to 325 degrees
  2. Season the inside of the duck with salt and pepper, truss it, prick the skin around the thighs, back, and lower part of the breast. Dry it thoroughly. Brown it slowly on all sides in the heated olive oil. Use a heavy, oval casserole for this - Le Creuset is ideal.
  3. Pour out the browning fat. Salt the duck and place it breast up in the casserole. Add the herbs (place them in cheese cloth or an infuser), cover the casserole, and and place in the oven (mid level). Roast for 50 - 60 minutes.
  4. While the duck is cooking, peel the turnips and cut into thin ovals. Drop into boiling, salted water and boil for 5 minutes. Drain.
  5. After the duck has roasted for 50 - 60 minutes, degrease the casserole with a baster. Arrange the turnips around the duck and return it to the oven. Baste occasionally. Cook for another 30 - 40 minutes.
  6. Drain the duck, place on a hot platter, and serve with parsley sprinkled on top.

Friday, August 27, 2010

10 Simple Pre-School Lunch Ideas

Pre-school lunch is a challenge. As I wrote last year, a lot of love and angst goes into packing a lunch, and in the end the most important thing is that the kids learn how to have a meal together. That being said, here are 10 simple, effective, and fun ideas to make pre-school lunch more enjoyable for all:

  1. Something dip-able. Kids love to dunk things, so pack a little cream cheese or yogurt in a container with an easily removable top, add some baby carrots, and you have a party.

  2. Pack a surprise toy. Nothing elaborate like an American Doll or Buzz Lightyear, but a few tattoos or a yo yo.

  3. Send weather appropriate meals. If it is cold and rainy, a small thermos of chicken soup is a big hit (especially with crackers...see point 1). Warm and balmy weather calls for lighter and cooler fare.

  4. Mix up the drinks. Send water most days, but every once in a while throw in some chocolate milk for kicks - they love being surprised.

  5. Cut fruits into small, manageable pieces - they are too small to do it themselves, and the teachers don't have the time to help.

  6. Cheese sticks are always a big hit. Alternatively, slice cheese into fun shapes using cookies cutters and place in a ziplock bag.

  7. Don't over do or overlook dessert. If you put in too much, they go nuts and the teacher will be calling you in to discuss their behavior/your choices. If you do too little, they feel sad watching their friends guzzle down treats. Here are some ideas: a single homemade cookie or brownie, chocolate dipped strawberries, or 1/3 of a muffin (try the muffin top only - that always goes well).

  8. Wrap it up. Place a choice morsel in a box and wrap it up in paper with a ribbon. Kids love presents.

  9. Try to avoid peanuts, sesame products, and anything on the allergy alert list. Kids swap lunches and then some; it is a nice courtesy to the other parents and school.

  10. Place photos in the lunch box, so when they eat they can see you and your family or even their favorite toys and or pets, and be comforted. You can purchase single photo sleeves to protect the pics,
What are your best pre-school lunch solutions? Comment below and tell me about it.

Monday, August 23, 2010

DIY: Corn Chowder

Rainy days make me yearn for soup. Even rainy summer days, when it is cold but humid, bring out this want in me.

We are on vacation in Beautiful Martha's Vineyard. The island is even beautiful through inclimate weather. Hollyhocks sway in the wind, waters are choppy with boats bobbing forcefully against the current, and the wind blows forcefully but sweetly all through the island. It has been raining for 2 days straight now, and we are all a little stir crazy. The house was feeling a little chilly and damp, and we all needed an excuse to get out so off to the farmer's market we went. I had recently purchased the Morning Glory Farm Cookbook, and decided on their roasted corn chowder, using their own farm fresh ingredients.

Now this soup is not part of my repertoire. I rarely cook bacon, and when I do it is turkey bacon. Moreover, I have a low threshold for excessive chopping and this recipe is replete with knife acrobatics - you need to chop leeks, celery, potatoes, onions, red peppers, corn, parsley, and thyme. Finally, I tend to stay away from cream based soups. So why this soup?

Being on vacation means a lot of things, most of all a change in venue. For me, that includes the kitchen. I love hunting around a rental kitchen, making do with old utensils and re-purposing pots and pans. And there is something inspiring about this that makes me want to cook outside my own boundaries, to shift the scenery of my own culinary life and try new things. And so corn chowder called to me as the perfect rainy day vacation solution.

As I said, there is a lot of chopping. My son wandered in and out of the kitchen while I as cooking, his eyes widening as he watched my knife flash over the cutting board again and again. He took a piece of pepper here, a little celery there, anxious to see what captured my attention. He also eyed the corn happily. Freshly roasted from the oven, it made a nice little snack while waiting for the big show.

The bacon sizzled while the rain drizzled outside, creating a nice cadence and wonderful aroma throughout the house. You need to season the pan with bacon drippings, which provides a nice smokey base to the soup. I then added the vegetables and sauteed them for a few minutes. From there, a simple roux followed by the remaining ingredients and voila, corn chowder. And lots of it - a big mess of a pot that will easily last through several meals.

This is restaurant quality fare, to be savored with a nice hunk of bread and a fire nearby if you can swing it. We all huddled over the soup, enjoying it's hearty warmth. Recipe is below, enjoy every bite.

Roasted Corn Chowder
Serves 8 - 10

Ingredients
6 ears of corn, kernels off the cob
1 tbsp olive oil
Pinch of sea alt
Fresh ground pepper
8 slices of high quality smoked bacon, finely diced
4 medium yukon gold potatoes, peeled or unpeeled, diced into 1/2 inch cubes
2 medium onions, medium diced
4 stalks of celery, trimmed and medium diced
2 medium leeks, white parts only, medium diced
1 red bell pepper, seeded, cored, and medium diced
4 tbsp unsalted butter
6 tbsp all purpose flour
1/2 cup dry sherry
6 cups chicken or vegetable stock
1 cup heavy cream
1 tbsp thyme, finely chopped
1 tbsp fresh chopped parsley
Salt and pepper to taste

Method
  1. Preheat the oven to 400 degrees
  2. Toss corn in olive oil, adding salt and pepper to taste. Lay in a sheet pan. Roast for 8 - 10 minutes. Set aside.
  3. In a heavy bottomed 5 - 7 quart pot, saute the bacon for 7 minutes. Drain, but leave a small amount in the pot for flavoring.
  4. Add the chopped vegetables and cook for 5 minutes, until tender. Add the butter. When melted, stir in the flour and cook for 3 minutes, stirring constantly. Add sherry and stir.
  5. Add the stock and bring to a slow boil for 15 minutes. Add the roasted corn, cream, herbs, salt and pepper. Reheat until hot bot not boiling. Serve.
For a vegetarian version, use vegetable stock, skip the bacon, and add 1 - 3 drops of liquid smoke.

Wednesday, August 18, 2010

Sip: Thirsty Lemonade

Today, I got on a bike for the first time in 10 years.

I have nothing against biking, just nowhere to put a bike in my urban home. Coupled with a general apathy toward sport, it has fallen to the wayside over the years. Until today. We are on vacation in beautiful Martha's Vineyard, MA, and this year rented me a bike of my own.

My daughter just learned to ride. She has a green monster of a bike that she proudly pedals up and down the street lie a pro. Five years old and already she shows the promise of an athlete in all her endeavors; her gymnastics teacher named her 'muscles'. Anyway, she has been asking if I could ride a bike too, and a little voice in my head told me, "yes you can, yes you must".

I stood next to my wobbly grey bike, getting ready to get on, when my husband snuck up to wish me luck. "By the way, you know how to use the gears, right?" Gears? What are gears? I never learned to ride with gears. Panicked, I let him show me the way to use them, and coach me on hills, up and down. I was getting ready to make an excuse, fake a leg cramp, offer uxorious erotica, anything to get out of it, when my daughter sidled up to us and asked brightly, "Ready, Mommy?" Her expectant face was so full of excitement, and hope, and I could not say no.

The kids piled into a trailer attached to my husband's bike while I went out to practice. One leg, two legs, BRAKE. Over and over I did this until suddenly I just let go. I am not sure why or when this happened, I only know that it did, and when I released my legs I let go of my fears, letting them float away off the lagoon and back to the shores from whence they came. Biking felt good. I did a mile and change, my daughter yelling from the trailer, "You're doing it Mommy. You're doing it. Good job!" My son gave an appreciative wail of support. We had a great time, and when I came back I was feeling content and upbeat. And thirsty. Which is when I made my favorite lemonade.

This is a great drink for summer days and nights, when you are tired from the heat but still wish the day wouldn't end. It can be easily perked up with a few frozen strawberries or some ice cold vodka. Or both, whatever works for you. The secret is simple syrup, a combination of equal parts hot water with sugar. It forces the sugar to dissolve, and allows the sweetness to travel evenly throughout the pitcher.

I drank my lemonade for one, enjoying a few moments of solitude and a little personal pride. It is sweet but sour, cold yet warm from the citrus. The thin circles of lemon reminded me of my bicycle wheels, and it was the perfect way to celebrate my little triumph. Enjoy every sip.

Lemonade
Serves 4

4 cups of water, plus 1/2 cup
1/2 cup sugar
Juice from 3 lemons

  1. Pour 4 cups of water into a pitcher with ice. Set aside.
  2. Heat 1/2 cup of water to boil. Add and dissolve sugar. Stir mixture into pitcher.
  3. Add lemon juice to the pitcher. Serve.


Monday, August 9, 2010

DIY: Roasted tomatoes


Summer is a hot and sticky time, and on those particularly sweltering days, I have a hard and fast rule: nothing that cooks for more than 10 minutes. There are lots of great options, including a no cook meal like cold cuts or salad. But by far my favorite recipe is roasted tomatoes.

First of all, I like to construct my meals whenever possible. This meal makes me feel like I am at a cocktail hour at a wedding. You take a slice of bread, layer it with mozzarella and roasted tomato, and boom, before you know it the whole thing is gone. It brings the table together, because everyone has common space and purpose, building great community.

Next, it cooks in 10 minutes. 10 minutes is still doable on a hot day, although I admit I crank up the AC before starting. 10 minutes is a blink of an eye, just shy of microwave efficiencies. Finally, 1o minutes is just enough time to slice the bread and cheese, clear and set the table, and yell at my kids.

Moerover, some would argue that a nice raw tomato salad beats that any day, and I hear that. I love a caprese salad. But the roasted tomatoes pack this incredible, juicy, flavorful punch that cannot be beat. Plus there is this texture thing happening, one that creates a unique mouth-feel that brings you back for more. The tomatoes become shrunken, wrinkly like fancy olives, and the skin becomes an asset to the fruit.

Now of course you can dress this up. Simply, using some basil leaves or oregano, even mint works. You can up the ante with some smoked mozzarella or Gouda. And you can certainly bake your own baguette, but that would violate the 10 minute summer rule and I have no patience for that. Any way you serve it, stay cool and enjoy every bite.

Roasted Tomatoes

Ingredients
2 pints of cherry or grape tomatoes, washed and dried
olive oil to drizzle
salt and pepper
12 oz wet mozzarella cheese
1 baguette

Method
  1. Pre-heat the oven to 400 degrees.
  2. Scatter tomatoes on a broiler pan lined with foil. Drizzle with olive oil and mix until coated. Season with salt and pepper.
  3. Roast for 10 minutes. Remove from oven and cool.
  4. Serve with mozzarella and baguette slices.

Sunday, August 1, 2010

Sweet: The Birthday Cake Diaries


This week is my daughter's 5th birthday. In addition presents, favors, decorations, guests, and the rest of the birthday requests, there is of course the cake.

The birthday cake is the centerpiece of a kid's party. It sets the tone, be it through decor or taste, for the rest of the party. Kids notice it, even more so than adults, and talk about it for many days after. So failure is not an option.

I have gotten pretty good at birthday cakes; not as good as my friend Rachel, who actually built a working volcano on her last masterpiece, but I can bake a decent cake. This year, I am challenged by a request for Thomas the Tank Engine, chocolate cake with pudding in the middle. I have my game plan in place, and am going to document it night by night, as I step through the process.

Day 1: Make the frosting and pudding
So the first part of today has been spent delaying as much as possible. This is an excellent waste of time, and terrific way to make yourself crazy later on. Going downstairs to take the butter out of the fridge. There, that's much better.

Here is the recipe for the pudding, shamelessly stolen directly from Martha herself. I have made this before with pretty good results. Just a little time consuming, but well worth the result. All done and mmm...good. Velvety, chocolaty, and very smooth, this a pudding lover's dream come true. Don't let the thickening psyche you out - you can feel when it is ready. Trust your whisk. Out of saran wrap, damn. Parchment paper to the rescue. Think the frosting will have to wait until tomorrow, unless I get a second wind.

Oh yeah, I forgot about all the other birthday food in the fridge...must alert my super organized husband and get him on the job.

Day 2: Make the cakes
Took out all the dry ingredients, mixed and sifted, got ready for the wet and realized none of it is at room temperature. Damn, damn, damn, damn. This gives me a few minutes to blog and berate myself for being such an airhead. It is 9:45 pm the night before the party and even though I took the day off, I have waited until now to begin baking.

This year I am challenged with a Barefoot Contessa Chocolate with Butter Cream recipe that is most likely as delicious as the rest of her repertoire. I really love her best of all the Food Network stars; she seems like the kind of person you would want at your table. Relaxed, casual, elegant. I love when she goes outside to cut herbs or takes us to her local chicken farm. But most of all I love her recipes, which I find to be simple by design although rarely easy in execution. TBC is work, work that is supposed to seem effortless which is not how at all consistent with how I am performing at the moment.

Watching it bake. Its after 11. Not sure if I over-mixed -it seemed a little on the fluffy side for batter. Smells good though.

OK, they seem cooked through and pretty moist, but I really screwed up when I turned one of them out. Cake pieces everywhere - I had to reconstruct them like a surgeon. Not sure how it will hold up tomorrow, but they are cooled, wrapped, and ready to be decorated.

Day 3: Assemble and decorate
Well as usual, the frosting is being done the day of the event. Not a big deal, just frustrating. The frosting is also from TBC. This is a traditional butter cream, the kind with a meringue base. Luckily, I saved the 8 egg whites from the pudding (which required 8 egg yolks), making this a very efficient recipe. I whip the whites into a frenzy, good, good, all is going well.

fuuuck. I just added warm chocolate to cold butter and it is now a soupy mess. Ruined. I have my tantrum until my together husband suggests sticking it in the fridge, which actually works! Super husband saves the day.

Now putting it all together. This is not a duplo set where everything fits together. The lower piece is in at least 20 pieces, all of which I carefully assemble and stick together with chocolate pudding. There, it somewhat resembles a rectangle. Frosting will even it that out later. I slather on a mound of pudding and top it with the remaining layer. Whew.

Now the next step is critical. Known as the crumb coat, it is the first layer of frosting to go on the cake. It gives the cake some shape, but more importantly layers down the crumbs so they are not all over the final product. I grab my bench scrapper, load on a pile of frosting, and stick it in the fridge for an hour. I am starting to feel more calm, and start hunting for decorations. Hey, the paper piece of a party blower works, as does a spare plastic Thomas train bubble blower. This is going to come together, I can feel it.

OK, it's been an hour. Frosting layer number two goes on without a problem. Back in the fridge for another hour.

Time to decorate. Nothing over the top - just happy birthday with some glitter pen icing, a little fringe on the bottom, and add the other pieces, voila. A birthday cake for at least 40 people. Too bad we are only having 20. Oh well, the neighbors will have a good week on us.

Anyway, the cake was a big hit; moist and delicious. Frosting was fabulous, just the right texture with hints of mocha. My daughter really enjoyed it, as you can probably guess. And as you now know,
the entire process was fraught with mistakes, recoveries, and love, as it should be. Happy birthday my beautiful girl. We love you so.

Wednesday, July 21, 2010

DIY: Fried Green Tomatoes At The Chez Noonie Cafe


Fried Green Tomatoes are worth the price of admission. The film was sentimental and heartwarming. The recipe is crunchy, fun, and delicious.

I have always wanted to make these, ever since I saw the film. But the tomatoes were hard to come by. I saw many an heirloom green tomato, but those are soft and ripe and mushy, the way they ought to be. Green tomatoes are firm; that is the key to this recipe. Firm tomatoes. Anything soft and mushy will not do, because it will fall apart when frying. So seek out green tomatoes, just regular tomatoes that have not ripened yet, at your market - it is the season for them.

Green tomatoes taste a little tart, and have a nice fleshy mouth feel to them. When fried, they become a slice of heaven, slightly warm and tender on the inside, crunchy and salty on the outside. There is something about the contrast of textures and flavors that makes this dish unique and wonderful.

I also enjoyed the cooking process. There is something comforting about the preparation; you need three shallow bowls, one each for the flour, milk/eggs, and corn meal. Then you dip in each bowl, one at a time, until you have mounds of these wonderful tomatoes sitting on a rack, waiting to be fried. I don't know if I would go so far as to call it zen like, but there was a flow after a while, where all I was doing was dipping and dredging...and my mind went south. I was surprised when I was done, I had so gotten caught in the doing, the moment.

And then of course there is the eating. I tried lots of condiments with this. Salsa was tasty, but messy. Mayonnaise was good, as it is with all manners of fried things. But hands down the best was ketchup. Something about tomato on tomato action just really works, yielding a tangy treat. I kept thinking about hamburgers, as the tomato kind of looks like a giant pickle covered with ketchup, a la Whopper. I bet a fried green tomato would taste great on a burger...mmm, must remember for next time.

In the film, they are cooked and enjoyed by two best friends, becoming a symbol of the life their cafe brought to a sleepy southern town. Now, I am not sure if they can bring an entire community together again. But people will come just to see them, and stay to eat them. They are novelty fare that will keep crowds and families pleased. Even my 2 year could not resist eating a 'motato'. Enjoy every bite.

Ingredients
4 medium sized, green tomatoes
1/2 cup white flour
1/2 cup milk
1 egg, beaten
1/2 cup corn meal
salt and pepper
1/4 cup olive oil

Method
  1. Mix milk and egg together in a shallow pan. Place flour and corn in like pans. Add salt and pepper to taste to the corn meal.
  2. Slice each tomato lengthwise into 4 equal slices. Trim the round ends.
  3. Dust each slice with flour, then dip in milk/egg mixture. Dredge each slice in corn meal. Set aside on a rack and complete the rest of the slices.
  4. Heat olive oil on medium in a frying pan. Add tomato slices and cook for 2 -3 minutes/side. Serve hot.

Sunday, July 18, 2010

The Lesser Evil: Pancakes


There is something about a summer pancake breakfast. My kids go berserk as soon as they see me take out the big bowls and spoons - they know what's coming. Maybe I do it this time of year because it reminds me of vacations, when there is plenty of time to make the morning meal and linger over the coffee. Making pancakes takes me to that happy place, and my kids straight to heaven.

But I see a lot of crazy short cuts to pancakes these days, and I have to say they scare me to no end. The other day I saw them sold in the freezer section of the supermarket, waiting to be microwaved in some poor kitchen with little time and low standards. The ingredient list was long and painful. The directions were brief and unappetizing. The calorie count rivaled the deficit. Stay away from frozen pancakes my friends - they are evil.

Evil comes in many forms, and it certainly manifests itself in the kitchen. But what does it mean? I always liked the definition of the devil, evil incarnate, from the film Broadcast News:

"What do you think the Devil is going to look like if he's around? Nobody is going to be taken in if he has a long, red, pointy tail. No. I'm semi-serious here. He will look attractive and he will be nice and helpful and he will get a job where he influences a great God-fearing nation and he will never do an evil thing... he will just bit by little bit lower standards where they are important. Just coax along flash over substance... Just a tiny bit. And he will talk about all of us really being salesmen. And he'll get all the great women."
The stuff at the market is a little like that. It is attractively prepared and packaged. It is helpful in that it seems to save time and effort. And let's face it, it has influenced a many a great nation, which is why we find ourselves in the state of food crisis we are in these days. It is therefore incumbent upon we consumers not to choose flash over substance, but to choose the lesser evil.

In the case of pancakes, next on the wrung of wrong is Bisquick. I am not a fan and honestly do not see the point of this product. But some folks swear by it. Here are the ingredients:
Enriched Flour Bleached (Wheat Flour, Niacin, Iron, Thiamin Mononitrate, Riboflavin, Folic Acid), Partially Hydrogenated Soybean and/or Cottonseed Oil, Leavening (Baking Soda, Sodium Aluminum Phosphate, Monocalcium Phosphate), Dextrose, Salt.
Bleached flour is a bad idea. To do it, firms use things like peroxide and chlorine, things you don't want in your hair much less your mouth. It is used purely for appearance, to seem whiter than white. Partially hydrogenated soybean or cottonseed oil anyone? I think we've established the dangers of these products. So why buy them in a mix? Bisquick works in a pinch, but the ouch factor is not worth it. Buyers beware.

From my own experience, the best way to get pancakes is to make them. They really are easy to do, taste great, are fun to cook, and ready in less than 1/2 hour. Best of all, when you make them yourself, you can be confident about what you are eating, without the fine print haunting you later.

Ways to further lessen the evil:
  • Add fruit such as bananas, blueberries, strawberries, cherries, apples, and anything else you enjoy.
  • Use almond flour, a terrific option particularly celebrated by the gluten free crowd. I have personally come to know and love cooking and baking with it.
  • Cut out the extra sugar, or at least lower your risks. Mix with palm sugar, and if you need syrup, use real maple syrup. Or consider agave, which has a much lower glycemic index.
They are so good, it's almost sinful, dare I say evil (pinky points to corner of mouth)? Enjoy every bite.

Blueberry Pancakes
Ingredients
1 1/2 cups unbleached flour
1 tsp salt
1/4 cup sugar
1 3/4 tsp double acting baking powder
2 beaten eggs
3 tbsp melted butter
1 cup of milk
1/2 cup blueberries

Method
  1. Mix the dry ingredients in one bowl.
  2. Mix the wet ingredients in another bowl
  3. Add the wet ingredients to the dry ingredients and combine until just mixed. Let this mixture sit for 15 minutes.
  4. Heat a skillet on medium until hot, then add pancake batter, 1/4 cup at a time. Dot tops with blueberries and let cook until bottoms are firm. Flip and let rise for approximately 1 minute, or until cooked through (you can tell if the bottom is brown and they have risen a little). Serve.

Friday, July 9, 2010

Homemade challah for the working woman

I recently headed back to the office after being at home for nearly 18 months. During that year and a half, I renewed my relationships with my children, husband, self, and…my kitchen. I have always been one to cook and entertain, but being at home upped the ante. I turned play dates into dinner dates. Every Friday was a complete Shabbat dinner. There was usually a homemade something or other for dessert. And we had so many leftovers, we had to literally give them away to the neighbors. During this time, I shopped at my leisure, stopping into boutique markets and buying direct from the farms. I founded a CSA. In short, I found a great deal of happiness and comfort in cooking, especially for those I love. It became more than a hobby; it became a passion.

Click to read more.

Wednesday, July 7, 2010

The Lesser Evil: Chicken Nuggets

Ew. I don't like that. Gross. Throw it out the window.

Yes, my lovely and loving children have said all these things to my dinners, and I to their preferences. This is of course the universal parent-child discourse, and in our house like many others they are fighting words, tactics that lead to escalation (que the spilled water) and worse. I try to avoid the confrontation, but it sometimes is impossible, especially if they have a very specific idea of what's for dinner tonight. Often, I am left to choose the lesser of several evils, in an effort to compromise what they enjoy eating with what I can live with preparing.

Given the above, let's talk nuggets. Chicken nuggets are tasty, easy to prepare, and 100% junk food. If you can live with that, more to you. I break them out on rare occasions, such as the long road trip with nothing but McDonalds in sight, or those nights when I have to suddenly work late and cannot possibly scramble dinner in time. Once in a while they are fine, but just understand that they are not really food per se. They are food products. Parts are not just parts.

A good alternative that seems to work for all is chicken tenders. A lesser evil, the tender is an actual part of the chicken breast, and therefore real as all get out. Chicken nuggets are to chicken tenders particle board as is to solid oak. You can buy pre-prepared chicken tenders, which are not necessarily the highest quality chicken, but a step above the nuggets. Even better, you can purchase the raw meat and make them yourselves, in under 10 minutes. They are my preferred lesser evil, and actually are enjoyed by all parties in the house, with no whining and the occasional, "mmm..good. Can I have some ice cream?"

Here are some options to lessen the evil:
  • Use grass fed, pasture raised chicken. It is better for you, and more humanely raised. Be prepared to be be poor for a few weeks though.
  • Skip the supermarket butcher and cut the tenders yourself. If you buy boneless, skinless, whole breasts, the tender is easily removed and used for this recipe. It's the side piece that kind of flops down over the larger breast. Often, I make tenders for the kids and use the breasts for grown-up recipes. Alternatively, make a big batch by cutting the breasts lengthwise into 1/2 inch strips.
  • Use real bread crumbs. Take some bread, cut it up, throw it in the food processor, and viola..bread crumbs a la Noonie.
  • Use a neutral fat like grapeseed oil to prepare this dish.
There are a lot of recipes out there for these tenders. Below is one that has worked for my family - give it a shot and see how the peeps respond. You'll know if its working by the glorious semi-silence that comes from those distinct, discreet eating noises at the dinner table. Happy sounds? You betcha. Enjoy every bite.

Breaded Chicken Tenders
Ingredients
3 boneless chicken breasts, cut into 1/2 inch strips
1 cup flour
1 tbsp salt
1 tsp black pepper
4 eggs, lightly beaten
1 cup bread crumbs
3 - 4 tbsp + 1 tbsp grapeseed oil

Method
  1. Place flour, salt, pepper, and any other seasoning you like into a ziplock bag. Add chicken and shake to coat.
  2. Place breadcrumbs in a bowl and mix in 1 tbsp oil
  3. Dip each piece of chicken in the egg, and then coat with breadcrumb mixture.
  4. Add remaining oil to a skillet and heat on medium-high. Fry each piece of chicken for 2-3 minutes on each side, or until cooked.
  5. Cool on a rack and serve shortly after with duck sauce, honey mustard, or whatever you have in the house.


Friday, July 2, 2010

DIY: Red Cabbage Slaw


I love me some red cabbage. In the winter, it is one of my favorite dishes, sauteed with apples, onions, and a big pot roast. So delicious. But I never thought of it as a summer vegetable until it showed up in my CSA loot. 'Wrong season', I thought. Wrong thinking it was.

Red cabbage as it turns out is very much in season. While traditionally seeded in spring and harvested in fall, it often comes early in summer with a little coaxing. Red cabbage is also full of nutrients, and very high in fiber. It is rare that something so tasty is so good for you, and I knew I needed to find a way to incorporate it into my summer diet.


I had researched a few recipes online, and found a variation of red cabbage slaw on the food network. Below is my adapted recipe, and boy it is a zinger. Crunchy red cabbage is complimented by a tangy vinaigrette, whose pungent taste is offset by sweet onions and cranberries. And then there are the honey roasted peanuts which truly make this dish sing off the plate. You can make a few variations that I bet would be terrific:
  • Asian: Substitute toasted sesame oil, rice vinegar, sesame seeds, mandarin oranges, and lo mein noodles.
  • Italian: Substitute red vinegar, zante currants, and toasted pine nuts.
  • Spanish: Substitute sherry vinegar, figs, and marcona almonds.
  • French: Substitute white wine vinegar, apples, and french burnt peanuts.
Or add just what you please...anything will work and who knows, maybe it's in season too :)

Enjoy every bite.

Red cabbage slaw
Adapted from the Food Network
Ingredients
1/2 red cabbage, sliced thin
4 carrots, chopped
1 small, sweet onion (red or white)
8 oz dried cranberries
1/2 cup apple cider vinegar
3 tbsp sugar
1/4 cup olive oil
2 tsp celery seed
salt and pepper
4 oz honey roasted peanuts, chopped

Method
  1. Add the cabbage, carrot, onion, and cranberries to a large bowl and mix well.
  2. In a small bowl, mix vinegar and sugar. Add oil, and gradually whisk in celery seed, salt, and pepper.
  3. Add vinegar mix to the vegetable mix and toss to coat.
  4. Let marinate for at least 30 minutes.
  5. Top with peanuts and serve.

Monday, June 28, 2010

DIY: Radishes In Miso Sauce


Chez Noonie got a new camera lens and wanted to take a close up of something under appreciated and often unnoticed. Then I received some radishes in my weekly CSA loot and soon after set my sights (and tastes) upon them. Radishes are overlooked at the supermarket. They are sold for next to nothing and often just act as a salad garnish that most people shunt aside in their search for more sumptuous morsels.

Truth is, they are attractive, warm, tasty, and it's worth paying attention to them. Radishes add terrific color to any dish. Their peppery skin adds a kick to anything from a salad to a sandwich to a side dish; when peeled, they are sweet and yielding, and make great eats. Also, they keep fresh in the fridge for a long time, making them a go to when everything has gone wilted. Finally, radishes are good for you. They are full of Riboflavin, Vitamin B6, Calcium, Magnesium, Copper and Manganese, and a very good source of Dietary Fiber, Vitamin C, Folate and Potassium. So listen up readers, because this recipe is worth trying.

I adapted this from a big oven recipe that calls for daikon radish, which is probably much easier to prepare. But it worked fine with garden variety red radishes, just a little more peeling involved. A few notes on it:
  • Red radishes require a lot of cleaning. Use a vegetable scrubber if you have one on hand, and clean it with the same rigor as you would a potato.
  • The original recipe called for serving it with chopped cilantro or nori, which I am sure would be nice. I decided to chop the discarded skins and let them pepper up the dish a little.
  • Make this a full dinner by poaching some sliced chicken with the radishes and serving with noodles.
  • You could also reserve the radish leaves and serve the above suggestion on top of them.
  • I am a big fan of the light miso for vegetables; any kind would likely work, but I think that the light miso, especially given the radishes high sugar content, works beautifully.

Braised Radishes in Miso Sauce
Ingredients
1 bunch of red radishes (10 - 12)
Water
1 tbsp miso light paste
1 small chili, sliced (I used a jalepeno)
1 tbsp sugar

Method
  • Peel the radishes and reserve the peels. Chop the radishes into thin circles and set aside. Chop the peels finely and set aside.
  • Simmer the water. Add the radishes and cook on simmer until soft, about 5 minutes.
  • Add chili, miso, and sugar. Simmer for another 5 minutes.
  • Strain the radishes and place on a platter. Sprinkle with chopped peel and serve.


Wednesday, June 23, 2010

On The List: Cacao Beans (And The Best Iced Mocha, Ever)


Cacao beans are just so improbable. Take a look at those smooth brown pods, and the last thing you would think is, 'oh,, they can be transformed into a delicious chocolate treat.' Visually, they are ho hum at best - like tan tear drops. As far as taste, lets say that eating them in the raw is about as tasty as chomping on an evergreen. These things are bitter. Chalky. Get this thing out of my mouth bad.

And yet they feel so good. I had heard many claims that they are full of anti-oxidents and provide an incredible energy boost. When I can stomach them, this has been all true, but the upfront costs are high and, well, yucky. There had to be a better way to get my kicks.


Enter iced coffee. Is there anything more summer than a glass of iced coffee? Yeah, there's the fruit and the warm breezes and all that jazz, but at the end of the day, at least for me, iced coffee is the pause that refreshes. And mocha, well that is just heaven on earth. Now imagine a mocha that sources caffeine from the cacao beans, and not just the coffee. One with tremendous health and nutritional content. Fewer headaches, less cravings, just an energy boost and tasty drink. I started to experiment with the two and came up with the below recipe. It bookends as a great way to start the morning and then later at end the day as a cocktail.

A few quick tips on this recipe:
  • Like your mocha STRONG? Double brew this brew. Complete the recipe, then pour it back in the machine and re-filter the whole thing. Do not expect to sleep for a while.
  • You can make this with 100% ground cacao beans. It tastes like very light brown chocolate water. Add some cayenne and you have a real boost, but this is an acquired taste.
  • For cocktails, add 2 - 4 tbsp vodka, chocolate liquor, Baileys, or Sambucca.
Cacao is the basis for all things chocolate. It is fermented, dried, roasted, tread upon (by human feet more often than not), and treated before becoming Godiva. The beans are the purest state of chocolate, and therefore highly touted by the raw crowds and chocoholics everywhere. Often, it makes it way to the super foods list because of its antioxidents and high vitamin and mineral contents. Grown largely in the tropics of South America and West Africa, from which fair trade and organic beans are available, cacao is poised to be one hot commodity, the next latest thing.

You can find raw cacao beans in your local health food stores, but I like to buy them online, as they seem fresher, especially from places that sell them in bulk like nutsonline. They are a bit pricey, but last for a long time and are very efficient, especially when ground.

Enjoy, and please comment below on your experiences with cacao, coffee, and cocktails.


Iced Mocha Coffee
Ingredients
3 tbsp finely ground raw cacao beans
6 tbsp ground, decaf coffee
48 oz (8 cups on the coffee machine) fresh, cold water

Method
  1. Mix the cacao and coffee grinds together
  2. Add grinds to your coffee machine.
  3. Add water. Brew.
  4. Fill a pitcher with ice. Pour hot coffee in the pitcher over the ice and allow to chill. Add more ice if necessary.
  5. Serve with cream and sugar/simple syrup.

Serves 6

Friday, June 18, 2010

Sweet: Blueberry Lime Tart


Blueberry and lime are like unknowing lovers destined to be together, who keep missing each other due to circumstances beyond their control. One is sweet, the other sour. Like all great love stories opposites attract, come together with great passion, and merge into one. Tart, that is.

I've had blueberry lime desserts floating around in my head for months now. I wanted to do a pie but never can get the juices to manage themselves properly - blueberry pies are messy by nature because of the fruit's high juice content. When cooked, blueberries yield tremendous volumes of juice, which in turn run all over the place. The only way to manage them is with a thickener like corn starch or meringue powder, and I hate adding stuff like that unless absolutely necessary.


A betty or slump or other deconstructed cake was also on my list of ideas, but I wanted something with a little more finish, to showcase it a bit. And then I sat down with my best friend and fellow baker Debbie. And she came up with the idea of a tart. Brilliant - the blueberries don't need to be baked, so less mess. The lime flavors burst from the lime curd and crust. And the best thing about this tart is that once you've made the lime curd and crust, it comes together in less than 10 minutes. It looks impressive, tastes great, and lends a real sense of occasion to any event.


Some suggestions for this recipe:
  • Consider using wild blueberries if you can find them. They are smaller, a little more tart, and make a charming presentation.
  • Be patient with the lime curd. It takes a while, truly 12 - 15 minutes, to come together. Like whipped cream, you'll know it when you see it. And btw, lime curd is yellow. Because egg yolks are the main ingredient.  Don't let it throw you off.
  • Don't use any bowls or pans made with reactive materials, like copper. It doesn't do well with acids.
  • If you want to go really nuts, make blueberry lime curd. Heat about 1/2 cup of blueberries with 1/8 cup sugar in a small pan. Let the juices burst from the berries. Strain, cool, and reserve the syrup. Swirl into the lime curd. Add to tart shell after removing foil and weights.
  • If you want to go completely over the top, add 1/2 cup sugar and 1 tbsp of lime zest to 1 cup heavy cream, and whip.  Fold whipped cream into the lime card , then swirl in the blueberry syrup, then add to tart shell after removing foil and weights. No need to top with blueberries, although you can serve them on the side. Fabulous.
This is food for lovers, not small children.  Tuck them into bed, light a few candles, and come together to enjoy a terrific day end finale.  Enjoy every nibble.

Ingredients
Crust
1/2 cup of butter (1 stick)
2 tbsp finely grated lime zest
1 3/4 cups flour
1 1/4 cup sugar
1 pinch of salt

Lime curd
1/2 cup butter (1 stick)
3/4 cup sugar
1/3 cup lime juice
3 tbsp lime zest
Pinch of salt
6 egg yolks


Topping
3 pints of blueberries
1/4 cup red current jelly

Method
Make the crust:
  • Melt butter in sauce pan over medium heat.  Add 1 tbsp zest and let stand for 5 minutes. 
  • Mix the flour, sugar, and salt in a medium bowl.
  • Pour the butter into the bowl slowly, stirring with a fork as you go. When dough comes together, transfer to a tart pan and press it in evenly. Prick with a fork throughout. 
  • Cover with foil and pie weights/beans, and bake for 2o minutes. Remove foil and weights, and then bake for another 10 - 20 minutes, until light brown.  Remove and cool on a rack.

Make the lime curd:
  • Melt butter on medium in a saucepan.
  • Remove from heat and add sugar, lime juice, lime zest, and salt.  Whisk, and then whisk in yolks until smooth.
  • Cook on low heat, whisking constantly.  This takes about 12 - 15 minutes.  It is ready when it has thickened enough to leave a trail on the back of a wooden spoon.  You will feel it thickening as you whisk. Do not allow this to boil.  
  • Strain immediately.  Cool to room temperature and then chill. 

Put it all together:
  • Heat red currant jelly on low heat in a small sauce pan, until liquefied. Remove from heat and reserve.
  • Pour the lime curd into the cooled tart. Scatter blueberries across the top of the lime curd. Brush blueberries with red currant jelly. Chill and serve.

Saturday, June 12, 2010

Win A Copy of Edible: A Celebration of Local Foods

edible bookShopping and eating locally are not as straight forward as they should be. It is far more convenient to buy a banana for 10 cents that traveled 1,000 miles to my stomach than it is to find and purchase an apple from a farm less than 30 minutes from my house. There's a lot of reasons for this. Subsidized agriculture. Cheap, foreign oil. Treasury Desks.

Moreover, once local food is found, it can be equally challenging to know what to do with it. Not all of us are a whiz with Asian Greens or Chard, and learning to cook with all things local can be quite a learning curve. Moreover, learning how to clean, store, and prepare local food is a pickle; it is not shelf-stable and does not confirm to common convention.

I can't change the big stuff, but I can try to manage myself. My contributions are simple, and I do what I can. Most nights I cook. I shop at the farmers markets and take Umami Girl's advice seriously. We helped to found a CSA. But at the end of the day, I need to start building more resources to help support my goal to eat locally.

Enter Edible: A Celebration of Local Foods. For those of you familiar with Edible Magazines, available for free across the country, get ready to enjoy. The book divides up nicely by geography, drilling down on what is available where, who sells it, how to store it, while all the way telling stories and making learning fun and breezy. Then there are the recipes for using these local foods, which are fabulous. They are separated by season, with notes on location. Finally,the photography is impressive as it is instructional. All in all one of the best books on eating locally that I have come across in my searches.

Want to win a copy? Comment below and tell me more about how you are trying to eat locally. What are you challenges, peeves, triumphs, and stories? Contest ends June 30, 2010. Winner will be chosen randomly and notified shortly thereafter.

Friday, June 4, 2010

DIY: Sesame Noodles


No, they don't have to come from Joy Luck.

Sesame noodles are easy to prepare, last forever in the fridge, and are ready in under 15 minutes. Bring them to a party and you will be the favored guest. Bring them to the dinner table, and you will be graced with ooh's and ah's befitting a far more elaborate meal. Served cold with a some veggies, chicken, or tofu, it's one of my favorite summer dishes.

This recipe comes from The Black Dog Summer on the Vineyard Cookbook, one of the best seasonal cookbooks I've ever used.  I love their pictures, stories, and recipes, and recommend it highly.

A couple of things to keep in mind when making this dish:
  • It makes a lot of sauce.  A LOT of it.  My advice is to let the noodles sit and chill in the whole thing for an hour or two, so they absorb the sauce.  Then strain the noodles and save the remaining sauce for just about anything under the sun including roasted vegetables, marinades, or even another batch of noodles.  The sauce should last for 2 weeks in the fridge.
  • You can really pair this with just about anything, but I think a firmer companion is your best bet.  Such as the aforementioned grilled chicken, extra firm tofu, shrimp, cucumbers, carrots, or celery.  These choices all complement the soft texture of the noodles, and also provide a nice cling for the sauce. 
  • Feel free to make peanut noodles by swapping peanut butter for tahini, and peanut oil for sesame oil.  Same measurements apply. 
  • Got picky eaters or folks with allergies?  Reserve a portion of the cooked noodles, slather them in butter, grated cheese, and pepper.  Top with whatever you were going to use for the sesame noodles and you have happy campers and cookers. 
Leave the Peking Duck for the Chinese restaurants; this recipe is one to make and cherish in your own kitchen.  Enjoy.

Sesame Noodles
Adapted from the Black Dog Summer on the Vineyard Cookbook

Ingredients
1 lb fresh or dried egg noodles
1 cup tahini
1 cup hot water
1 cup grapeseed oil
1 cup tamari or soy sauce
1/2 cup sugar
1/2 cup cider or rice wine vinegar
1/4 - 1/2 cup chili oil, to your preference
2 tbsp dark sesame oil
5 cloves garlic, chopped
3 scallions, chopped

Optional:
Grilled chicken
Cucumbers
Broiled tofu

Method
  1. Cook egg noodles per package instructions. Drain and strain. Add a drizzle of sesame oil to keep from sticking.
  2. Pour tahini and hot water into a large bowl, and whisk until smooth.
  3. Add grapeseed oil to the bowl.  Whisk.  Add tamari/soy sauce, sugar, and vinegar, one at a time, blending with a whisk after each addition. 
  4. Add chili oil and taste for spiciness. 
  5. Add sesame oil and garlic.  Blend. 
  6. Add noodles to sauce and allow to sit for at least 15 minutes.  Serve with scallions and whatever else pleases you.

Serves 4

Sunday, May 30, 2010

Food For Thought: To Everything, Turn, Turn, Turn

What's in season? 

Such a simple question has become so complicated.  In our 24x7 world, where everything is available anytime, is there even such thing as 'in season' any more?  It begs questions about my questions. 

Try the following quiz.  Answer each on a scale of 1 - 10, 1 being absolutely not and 10 being absolutely yes. Depending on what your answers are to these questions, it seems like you can make better choices, and live with them.  , "When you say in season, do you mean...":

A)   ...produce grown outdoors?  
My response:
7.  I like my food food grown outdoors but recogize that sometimes a hothouse is necessary.  A lab, not so much tolerance from me.  
B)   ...produce grown in soil?  If not, can you tolerate hydroponics or other means of production?
My response:
8.  I am hesitant about hydroponics and other unconventional farming methods. This is mostly due to my own lack of knowledge relating to the techniques, and further lack of time to research them properly.

C)   ...produce grown nearby? How do you define it? How do you know?
My response:
7. I prefer my food grown nearby, but recognize that I cannot always get what I want or need, and as a busy mom must occassionaly give in to my own constraints and limitations.  So my rule is, look for local first, and after that anything from the US or Canada goes. 
PS:  This tool from Epicurious is pretty helpful guide to question C; it provides a nice geographical overview of what is gowing, and when.  I recommend it as a simple way of keeping up with the farms.   

D)   ...produce grown without the aid of airplanes, ships, pesticides, sprays, other petroleum products? If not, are you limited by what you can eat?
My response:
7. See C.  I recognize that some of what my family eats comes from a long distance.  I accept that as a means to and end, that being eating fresh food.  I would be more than willing to pay extra for this indulgence.  As for sprays, etc I try to avoid anything that has been through this process, but sometimes do not have enough knowledge to make that call.  I always wash my fruits and vegetables in a special rinse, and take time to make sure they are clean before using them.

E)    ...produce that was picked within the last 5 - 7 days prior to sale? If not, how long can it sit in storage or on a shelf before you call it quits?

My response:

7. Yeah, OK it is important that it was picked recently.  But for things like apples which are naturally shelf stable, I am more lenient.  

Sadly, even after all this soul searching and self-awareness it is nearly impossible to cross-reference this knowledge with the actual choices I make at the market.  For most produce today, there are no answers to these questions.  The information is simply unavailable. And so that brings me to my final point, which is that more often than not, when inquiring about seasonality, we need a better epistological model.  You can know yourself and your limits.  But if the subject (fruits and vegetables) are unknowable, then we are presented with quite a philosophical conundrum.  If I feel strong tendancies toward absolutely yes for any or all of these questions, the only way to confirm, to know that I am adhereing to my own rules is to pick it from the farm myself.  And folks, that is not a practial way to live, at least for most of us in contemporary western society.  So compromises need to be made, controls instilled, and a healthy dose of faith applied.  Without it, we are not only without a sense of season, but an inability to reason. 


Friday, May 28, 2010

On The List: Zatar


Zatar is a mixture of sesame, sumac, hyssop, and other spices, finely ground together into a tapestry of taste and texture.  It imparts a warm, lemony, and earthy taste, unlike anything else I have ever sampled, and works well on roasted vegetables, baked pita bread, and all manners of meat.  Zatar is a great solution to the mid-week cooking blah's, where it adds tang and surprise to the "are we having that again" peanut gallery.  It also doubles nicely for holiday meals, given that so much of the sum of its parts have historic and religious import.  For example:
    Sesame: A wonderful seed that has been around since biblical days, although not mentioned explicitly in the Hebrew or Christian bibles.  It is repeatedly referenced in the Koran, especially as sesame oil.  It is also used as part of the mourning ritual:
    "Malik said, 'A woman whose husband has died should anoint her eyes with olive oil and sesame oil and the like of that since there is no perfume in it.' " Hadith - Muwatta 29.107
    Sumac: A powder made from the purple leaves of the Mid Eastern sumac tree, one much like the one in the Terebinth of Morah, which landmarked where Abraham traveled in Genesis.  
    Hyssop: There seems to be a lot of debate over which plant the bible actually was referencing as hyssop; the more common theories seem to place their bets on Syrian Oregano or marjoram. It is often referenced with purification and cleansing.  In Pslams 51:7, after King David has gone to Bathsheba, he asks for compassion. 
    "Be gracious unto me, O God, according to Thy mercy; according to the multitude of Thy compassions blot out my transgressions. Wash me thoroughly from mine iniquity, and cleanse me from my sin.For I know my transgressions; and my sin is ever before me. Against Thee, Thee only, have I sinned, and done that which is evil in Thy sight; that Thou mayest be justified when Thou speakest, and be in the right when Thou judgest.Behold, I was brought forth in iniquity, and in sin did my mother conceive me. Behold, Thou desirest truth in the inward parts; make me, therefore, to know wisdom in mine inmost heart. Purge me with hyssop, and I shall be clean; wash me, and I shall be whiter than snow."
I order mine online; you can find it at nuts online (my favorite for bulk dry goods) or amazon.  You can also purchase it in most Middle Eastern grocery stores; either way, just don't give up the search easily.  This spice mix has more aliases than a terrorist watch list, and is also known as zaatar, zatr, zahatar, or satar. Once you have it, it keeps well in a dark canister for about a year.  

Below is my Friday night standard Shabbat dinner; I find the zatar gives the chicken and potatoes a nice zing and terrific color, and hope you enjoy it as much as my family does.  


Zatar Chicken a la Noonie

Ingredients
1 4 - 5 lb chicken, washed, patted dry, and cut into 8 pieces
1/4 cup + 2 tbsp olive oil
Kosher salt and pepper
1 oz zatar
2 lemons, zested and juiced
1 lb of fingerling potatoes, cleaned and scrubbed

Method
  1. Preheat the oven to 350 degrees.
  2. Sprinkle olive oil on chicken.  Massage kosher salt and black pepper into the chicken. 
  3. Sprinkle chicken with zatar and massage gently into the meat.  Place in roasting pan.
  4. Sprinkle lemon zest, less 1 tsp, on top of chicken pieces, and then add the lemon juice.
  5. Roast the chicken for 1 hour.  While cooking, prepare the potatoes.  In a bowl, combine potatoes, olive oil, and 1 tbsp kosher salt.  Massage thoroughly.  Add remaining 1 tsp of lemon zest to the mix.  Set aside.
  6. After the chicken has cooked for 30 minutes, add the potatoes to the roasting pan. Continue to cook for the remaining 30 minutes.  
  7. At the end, turn on the broiler for an an additional 5 minutes.  Remove pan from oven, allow chicken to rest for 10 - 20 minutes under foil.  Serve warm. 
Note:  You can also throw in green beans for the last 10 minutes of cooking.  They work well with zatar, and the chicken fat and olive oil will cook them beautifully. 

Photo courtesy of Ken Chen